Is your fuel gauge acting up and leaving you guessing how much gas you really have? It’s frustrating and can even be dangerous if you run out of fuel unexpectedly.
But before rushing to a mechanic, you can check if the problem lies with your fuel gauge using a simple tool you probably already have—a multimeter. In this guide, you’ll learn exactly how to test your fuel gauge step by step.
By the end, you’ll know if your gauge is faulty or if something else is causing the issue. Keep reading to save time, money, and avoid those unexpected fuel scares.
Credit: marinehowto.com
Tools Needed
Testing a fuel gauge with a multimeter needs the right tools. Using the correct equipment makes the process easier and more accurate. This section explains what tools you need to test a fuel gauge properly.
Choosing The Right Multimeter
Select a multimeter that measures voltage, resistance, and continuity. A digital multimeter is better for clear readings. It should have a range that covers 0 to 20 volts. Check for a multimeter with easy-to-read numbers and a backlight. Make sure the probes are in good condition for safety and accuracy.
Additional Equipment
You need insulated gloves to protect your hands. Use a screwdriver set to access the fuel gauge wires. A wiring diagram for your vehicle helps find the right test points. Keep a notebook and pen to write down your readings. Having a flashlight helps if you work in a dark area.

Credit: www.youtube.com
Safety Precautions
Testing a fuel gauge with a multimeter requires careful attention to safety. Working with vehicle electronics involves risks that can cause injury or damage. Taking proper safety steps protects both you and your vehicle. Understanding these precautions is key before starting any tests.
Working With Vehicle Electronics
Always turn off the vehicle before connecting the multimeter. Remove the key from the ignition to avoid accidental starts. Avoid touching metal parts inside the vehicle. Use insulated tools to prevent short circuits. Keep your hands dry and clean for better grip and safety. Disconnect the battery if possible to reduce electrical risks.
Preventing Electrical Hazards
Check the multimeter for damage before use. Use the correct setting on the multimeter to match the test. Never touch both multimeter probes at the same time. Avoid testing in wet or damp areas. Wear safety glasses to protect your eyes from sparks. Keep flammable materials far from the testing area. Follow all instructions carefully to avoid shocks or burns.
Locating The Fuel Gauge Components
Locating the fuel gauge components is the first step in testing your fuel gauge with a multimeter. Knowing where each part is helps you check them properly. This section guides you through finding the fuel sending unit and the wiring for the fuel gauge.
Finding The Fuel Sending Unit
The fuel sending unit sits inside the fuel tank. It measures how much fuel is left. To find it, open the trunk or lift the rear seat. Look for a round cover or access panel. Remove screws or clips to reach the sending unit. Be careful not to damage any parts. The sending unit connects to a float arm that moves with the fuel level.
Accessing The Fuel Gauge Wiring
The wiring links the fuel sending unit to the fuel gauge on your dashboard. Find the wiring harness behind the dashboard or under the hood. Use a flashlight to see better. Look for wires that match your vehicle’s manual colors. Gently pull back covers or panels to access the wiring. Check for any loose or damaged wires before testing with the multimeter.
Setting Up The Multimeter
Setting up the multimeter correctly is the first step in testing a fuel gauge. Proper setup ensures accurate readings and protects the device from damage. This section explains how to prepare your multimeter before taking measurements.
Selecting The Correct Measurement Mode
Choose the right mode on your multimeter for testing the fuel gauge. Usually, the fuel gauge circuit involves resistance or voltage. Set the multimeter to measure volts DC for voltage testing. For resistance, switch to the ohms (Ω) mode. Incorrect mode selection can cause wrong readings or damage.
Calibrating The Device
Check the multimeter’s calibration before use. Calibration ensures the device shows accurate values. To calibrate, turn the dial to zero or follow the manufacturer’s instructions. Some multimeters have a calibration feature or require manual adjustment. A well-calibrated multimeter delivers reliable test results.
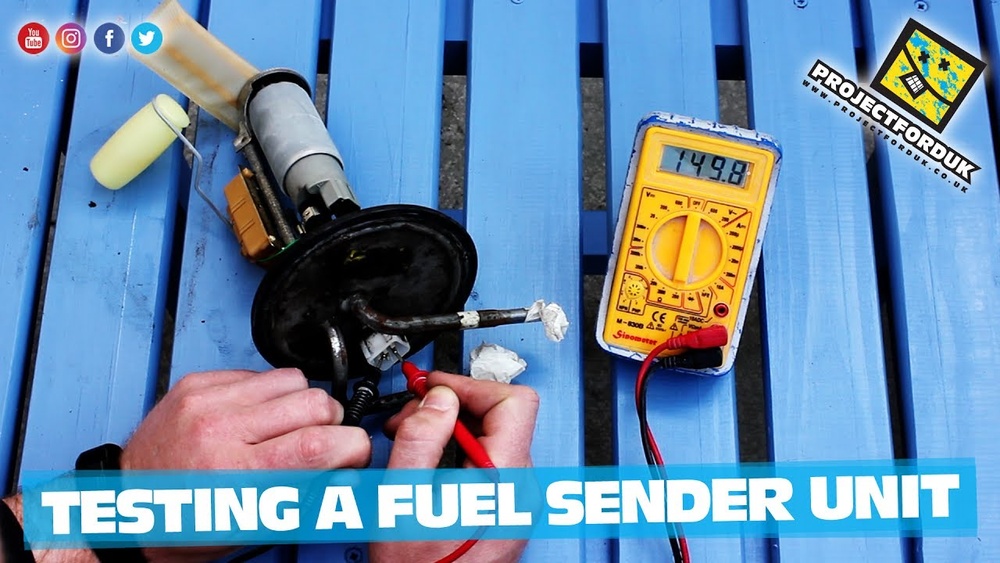
Testing The Fuel Sending Unit
The fuel sending unit plays a key role in showing how much fuel is in the tank. Testing it with a multimeter helps find out if it works right. This test checks the electrical resistance of the sending unit. Resistance changes as the fuel level changes. It helps the fuel gauge give the right reading.
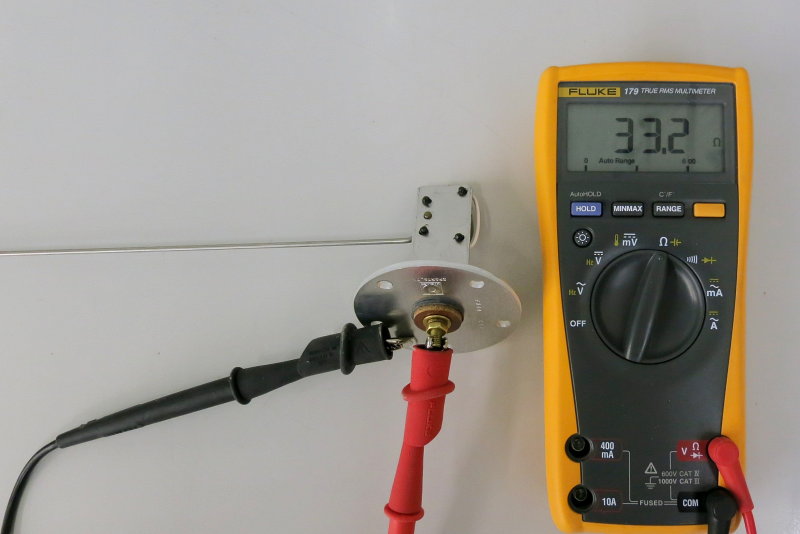
Measuring Resistance
First, turn off the vehicle’s power. Disconnect the sending unit from the fuel gauge. Set the multimeter to measure resistance (ohms). Connect the multimeter leads to the sending unit terminals. Move the float arm slowly through its range. Watch the resistance change on the multimeter. It should change smoothly without sudden jumps.
Interpreting Resistance Values
Check the vehicle manual for the correct resistance range. At empty, resistance is usually highest. At full, resistance is lowest. A steady change means the sending unit works well. If resistance stays the same or jumps, the unit is faulty. Replace the sending unit if values fall outside the range.

Credit: sailmagazine.com
Testing The Fuel Gauge
Testing the fuel gauge is a key step to find out if it works well. This helps avoid wrong fuel readings that may cause trouble while driving.
Using a multimeter makes the test simple and clear. It allows you to check the electrical parts of the gauge for faults or damage.
Checking Voltage
First, turn the car’s ignition to the ON position without starting the engine. This powers the fuel gauge circuit.
Set the multimeter to measure DC voltage. Connect the positive probe to the fuel gauge input wire. Attach the negative probe to a good ground.
The multimeter should show a voltage close to 12 volts. A low or zero reading means there might be a wiring or power problem.
Verifying Gauge Response
Next, watch the fuel gauge needle. Slowly move the float arm inside the fuel tank or simulate it with a test tool.
The needle should move smoothly from empty to full positions. If it stays stuck or moves erratically, the gauge or sender might be faulty.
Check the resistance of the fuel sender using the multimeter. This helps confirm if the sender sends the correct signal to the gauge.
Troubleshooting Common Issues
Troubleshooting common issues with a fuel gauge is key to accurate fuel readings. Problems often arise from wiring faults or broken parts. Identifying these issues early saves time and money. Using a multimeter helps check electrical connections and components effectively. Follow clear steps to find and fix problems fast.
Identifying Faulty Wiring
Start by inspecting the wiring connected to the fuel gauge. Look for loose, frayed, or corroded wires. Use a multimeter to test for continuity in each wire. No continuity means the wire is broken and needs repair. Check the connectors for dirt or corrosion that can block signals. Clean or replace damaged connectors to restore proper flow.
Replacing Defective Components
Test the fuel sender unit with the multimeter to check resistance. Compare the readings with the manufacturer’s specifications. Out-of-range readings indicate a faulty sender unit. Replace the sender unit if tests show it is defective. Also, test the fuel gauge itself by measuring voltage input and output. Replace the gauge if it fails to respond correctly. Proper replacement fixes the fuel gauge system reliably.
Tips For Accurate Results
Getting accurate results while testing a fuel gauge with a multimeter is important. Small mistakes can lead to wrong readings. Follow these tips to get clear and correct measurements. This helps you understand the fuel gauge condition better. Simple steps can make a big difference in your testing process.
Ensuring Stable Connections
Make sure the multimeter probes touch firmly on the test points. Loose or shaky contacts cause fluctuating readings. Use clean and dry probe tips to improve connection. Hold the probes steady during the test for consistent results. Avoid moving wires or parts while measuring voltage or resistance. A steady connection prevents false errors in your readings.
Avoiding False Readings
Turn off the vehicle before testing the fuel gauge circuit. This stops interference from other electrical parts. Remove any dirt or rust from terminals before placing probes. Check your multimeter settings twice before starting the test. Use the correct measurement mode, such as voltage or resistance. Avoid touching metal parts with your fingers to stop static shocks. These steps reduce the chance of false or misleading results.
Frequently Asked Questions
How Do I Test A Fuel Gauge With A Multimeter?
To test a fuel gauge, connect the multimeter probes to the gauge terminals. Set the multimeter to measure resistance. Check if the resistance matches the fuel level sensor’s specifications. This helps determine if the gauge is functioning properly or needs replacement.
What Multimeter Setting Is Best For Fuel Gauge Testing?
Use the resistance (ohms) setting on your multimeter. This setting measures the fuel sender unit’s resistance. It helps verify if the fuel gauge sends accurate signals to the dashboard. Always refer to the vehicle’s manual for specific resistance values.
Can A Faulty Fuel Gauge Be Fixed With A Multimeter Test?
Yes, testing with a multimeter identifies if the gauge or sender is faulty. If resistance readings are off, the sender or gauge may need repair or replacement. This test saves time by pinpointing the exact issue in the fuel system.
How Do I Interpret Fuel Gauge Multimeter Readings?
Compare the multimeter resistance reading to the manufacturer’s specifications. Higher or lower resistance than normal indicates a problem. A stable resistance value means the fuel gauge and sender are working correctly. Use this to diagnose fuel gauge issues effectively.
Conclusion
Testing a fuel gauge with a multimeter is simple and useful. You can find problems early and save money. Just follow the steps carefully and take your time. A working fuel gauge helps you avoid running out of gas. Practice this skill to keep your vehicle safe.
Remember, safety first—always work with the engine off. Now, you can check your fuel gauge anytime. It’s a small task that makes a big difference.

I’m Asif Ur Rahman Adib, an Electrical Engineer and lecturer. My journey began in the lab, watching students struggle with instruments they used every day without fully understanding them. Over time, I’ve combined teaching, research, and hands-on experience to help others grasp electrical concepts clearly, safely, and practically—whether it’s understanding a circuit or mastering a multimeter.