Are your trailer lights acting up? You might not need to call a mechanic just yet.
Knowing how to check trailer lights with a multimeter can save you time, money, and frustration. Imagine being able to spot the problem quickly and fix it yourself—no guessing, no wasted trips. This simple skill puts you in control and keeps your trailer safe on the road.
Keep reading, and you’ll learn step-by-step how to test your trailer lights like a pro, even if you’ve never used a multimeter before.

Credit: www.wikihow.com
Tools Needed
Checking trailer lights with a multimeter needs some basic tools. Having the right tools makes the process simple and safe. These tools help find if the lights work or if there is a wiring problem.
Multimeter
The multimeter is the main tool to check trailer lights. It measures voltage and continuity. Choose a digital multimeter for easy reading. It shows if the light circuit has power or if a wire is broken.
Test Leads
Test leads connect the multimeter to the trailer wiring. Use good-quality leads with sharp tips. They help touch small wires and terminals without slipping. Keep them clean for accurate readings.
Trailer Wiring Diagram
A wiring diagram shows the color codes and connections. It guides you where to test each light wire. Print or save a copy for quick reference during the check.
Gloves
Wear gloves to protect your hands. Trailer wiring can have sharp edges or dirt. Gloves keep your hands safe and clean while testing.
Flashlight
A flashlight helps see wires and connectors clearly. It is useful in low light or at night. Bright light ensures correct testing and reduces mistakes.
Credit: www.truckspring.com
Preparing The Trailer
Preparing the trailer is the first step before checking trailer lights with a multimeter. Proper preparation makes testing easier and safer. It also helps find problems quickly.
Start by making sure the trailer is parked on a flat, stable surface. This prevents any movement while working. Next, disconnect the trailer from the towing vehicle. This stops any power from the truck that could cause wrong readings.
Inspect the trailer wiring for visible damage like cuts or cracks. Damaged wires can cause lights to fail or give false multimeter readings. Also, clean any dirt or rust from the connectors to ensure good contact.
Position The Trailer For Easy Access
Move the trailer to a spot where you can easily reach the lights and wiring. Good lighting helps see small wires and connectors clearly. Avoid dark or cramped spaces.
Disconnect The Trailer From The Vehicle
Unplug the trailer wiring harness from the vehicle’s connector. This stops power flow and protects your multimeter. It also isolates trailer wiring for accurate testing.
Inspect The Wiring And Connectors
Check all wires for breaks, cuts, or wear. Look inside connectors for dirt or corrosion. Clean connectors with a brush or cloth to improve contact.
Gather Tools And Safety Gear
Get a multimeter, test leads, and a flashlight ready. Wear gloves to protect hands from sharp wires. Keep a notepad to record your test results.
Setting Up The Multimeter
Setting up the multimeter correctly is the first step to checking trailer lights. This ensures accurate readings and prevents damage to the device. Follow these simple steps to prepare your multimeter for testing trailer lights.
Choosing The Right Multimeter Mode
Turn on the multimeter and select the correct mode. Use the voltage setting, usually marked as “V” with a straight line for DC voltage. Trailer lights run on direct current, so this is essential.
Setting The Voltage Range
Set the range to 12 volts or higher. Most trailer lights use 12V systems. If your multimeter is auto-ranging, it will adjust automatically. Manual meters need the range set before testing.
Connecting The Test Leads
Plug the black lead into the common (COM) port. Insert the red lead into the port labeled for voltage (often marked “V”). Proper connection prevents wrong readings and protects the multimeter.
Preparing The Trailer Light Circuit
Turn on the trailer lights or the vehicle’s light switch. This powers the circuit you will test. Keep the trailer connected to the vehicle for accurate voltage measurement.
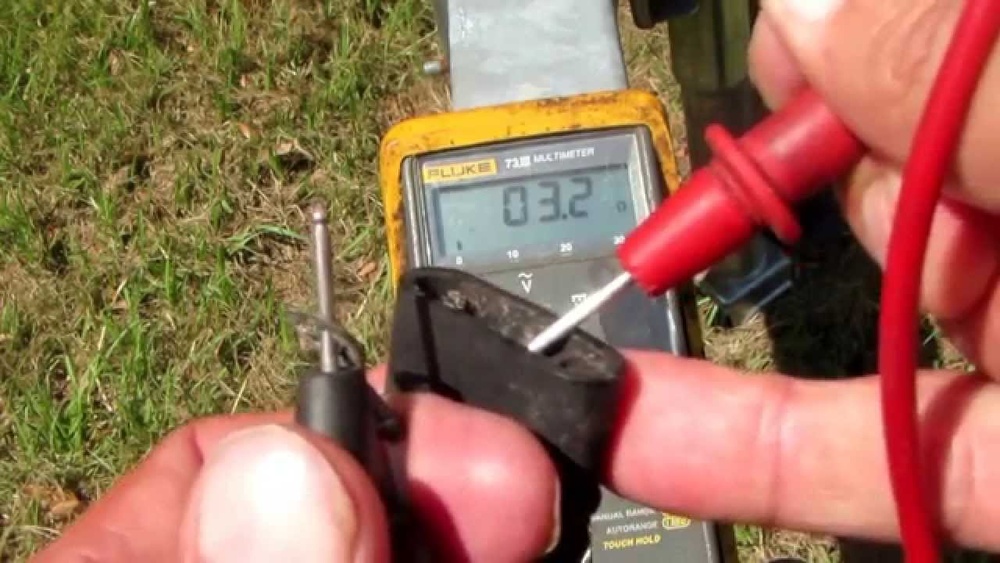
Testing The Power Supply
Testing the power supply is the first step in checking trailer lights with a multimeter. It ensures the trailer gets enough power to work properly. Without the right voltage, the lights may fail or flicker.
Start by measuring the battery voltage. This helps confirm the battery has enough charge to power the trailer lights. Next, inspect the trailer connector. This part links the trailer to the vehicle’s electrical system. Checking it can spot loose wires or corrosion.
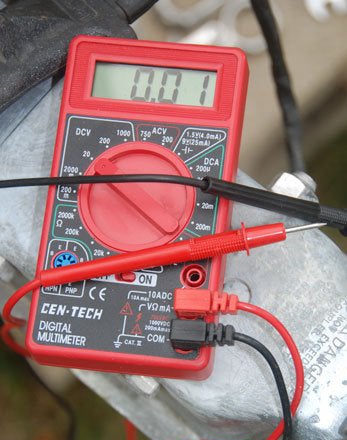
Checking The Battery Voltage
Set your multimeter to measure DC voltage. Connect the red probe to the battery’s positive terminal. Place the black probe on the negative terminal. A healthy battery usually shows around 12.6 volts. If the reading is below 12 volts, the battery may be weak or drained. Low voltage can cause trailer lights to dim or stop working.
Inspecting The Trailer Connector
Turn off your vehicle before inspecting the connector. Look for dirt, rust, or broken pins. These can block the power flow. Use the multimeter to check voltage on each pin. Attach the black probe to a ground point. Touch the red probe to each pin while the vehicle’s lights are on. You should see voltage readings near 12 volts. Missing or low voltage means a wiring problem or a bad connection.
Testing Individual Trailer Lights
Testing individual trailer lights is important for safe driving and legal compliance. Each light has a specific role in signaling and visibility. Using a multimeter helps find faults quickly and clearly. This section explains how to test different trailer lights step-by-step.
Tail Lights
Tail lights must work to show your trailer’s position at night. Set your multimeter to the DC voltage setting. Turn on the vehicle’s lights. Touch the black probe to the trailer’s ground wire. Place the red probe on the tail light wire. A reading close to 12 volts means the light receives power. No voltage means a wiring or bulb issue.
Brake Lights
Brake lights warn drivers behind you when you stop. Press the brake pedal firmly. Set your multimeter to measure voltage. Probe the brake light wire with the red lead. Connect the black lead to ground. The multimeter should show about 12 volts. Low or no voltage signals a problem in the brake light circuit.
Turn Signals
Turn signals indicate your direction changes. Turn on the left or right signal. Set the multimeter to voltage mode. Check the signal wire by touching the red probe. Connect the black probe to ground. Voltage should read near 12 volts and blink with the signal. No reading or steady voltage means a bulb or wiring fault.
Reverse Lights
Reverse lights help others see when you back up. Shift the vehicle into reverse. Use the multimeter on voltage setting. Touch the red probe to the reverse light wire. Ground the black probe on the trailer frame. A steady 12-volt reading shows the light circuit works. No reading means a wiring or bulb problem.

Credit: www.youtube.com
Interpreting Multimeter Readings
Interpreting multimeter readings is a crucial step in checking trailer lights. It helps to know if the lights get power or if wires are broken. Understanding these readings lets you fix problems quickly and safely.
The multimeter shows numbers that tell the electrical condition. These numbers need to be read correctly. This section explains how to understand the main readings for trailer light testing.
Reading Voltage Levels
Voltage shows the electric pressure in the circuit. Trailer lights usually run on 12 volts. A reading close to 12 volts means power is present. Lower numbers suggest weak power or bad connections. Zero volts means no power at all.
Checking Continuity
Continuity tests if the wire or bulb is complete. The multimeter beeps or shows zero resistance for good continuity. If there is no beep or the number is very high, the wire is broken or the bulb is faulty. This test helps find open circuits.
Measuring Resistance
Resistance tells how hard it is for electricity to flow. Low resistance means the circuit is good. High resistance may indicate corrosion or loose connections. A very high or infinite resistance means a break in the circuit. Check resistance to find hidden faults.
Troubleshooting Common Issues
Checking trailer lights with a multimeter can solve many issues. Some problems are simple to fix. This section covers common troubles you may find.
Blown Fuses
A blown fuse often stops trailer lights from working. Use your multimeter to check the fuse’s continuity. If the meter shows no connection, replace the fuse. Always carry spare fuses for quick fixes.
Corroded Connectors
Connectors can get dirty or rusty over time. This corrosion blocks electricity flow. Inspect the connectors for green or white buildup. Clean them with a wire brush or sandpaper. After cleaning, test with the multimeter again.
Damaged Wiring
Wiring may break or wear out from road use. Look for cuts, cracks, or exposed wires. Use the multimeter to test each wire’s voltage. Replace any damaged wires to restore proper function.
Safety Tips
Checking trailer lights with a multimeter requires care and attention. Safety is important to avoid injury or damage. Follow simple safety rules to work safely and effectively.
Wear Protective Gear
Always wear gloves to protect your hands from sharp edges. Use safety glasses to shield your eyes from sparks or debris. Proper gear helps prevent accidents during testing.
Turn Off The Vehicle
Switch off the vehicle before testing the trailer lights. This stops electrical shocks and short circuits. Confirm the power is off by testing the multimeter on a known off circuit.
Use The Right Multimeter Settings
Set the multimeter to the correct mode, usually “voltage” or “continuity.” Wrong settings can damage the meter or give false readings. Double-check the dial before measuring.
Avoid Wet Conditions
Work in a dry area to prevent electrical hazards. Water can cause short circuits or shocks. If the trailer or ground is wet, wait until it dries.
Secure The Trailer
Make sure the trailer is parked on level ground. Use wheel chocks to stop the trailer from moving. A stable trailer reduces risk of accidents while testing.
Keep Tools Organized
Arrange your multimeter and probes neatly before starting. Avoid tangled wires or misplaced parts. This keeps your workspace safe and efficient.
Frequently Asked Questions
How Do I Test Trailer Lights With A Multimeter?
To test trailer lights, set your multimeter to DC voltage. Connect the probes to the trailer’s wiring terminals. Check for voltage when the lights are activated. A reading shows the circuit is working correctly.
What Multimeter Setting Is Best For Trailer Lights?
Use the DC voltage setting on your multimeter for trailer lights. This setting measures the electrical current powering the lights. Ensure the multimeter range covers 12 volts for typical trailer systems.
Why Are My Trailer Lights Not Lighting Up?
Common causes include blown fuses, faulty wiring, or a bad ground connection. Testing with a multimeter helps identify where the voltage is missing. Repair or replace the faulty part to restore light function.
Can I Check Trailer Light Bulbs With A Multimeter?
Yes, use the continuity or resistance setting on the multimeter. A good bulb shows low resistance, while a burnt bulb shows high or infinite resistance. This test confirms if the bulb is functional.
Conclusion
Checking trailer lights with a multimeter keeps you safe on the road. It helps find problems fast and saves money on repairs. The process is simple and anyone can learn it. Regular checks prevent accidents and keep lights working well.
Use your multimeter to test bulbs, wiring, and connectors. Stay calm, follow steps carefully, and double-check your work. Good trailer lights mean safer trips for you and others. Keep practicing, and this skill will become easy and useful.

I’m Asif Ur Rahman Adib, an Electrical Engineer and lecturer. My journey began in the lab, watching students struggle with instruments they used every day without fully understanding them. Over time, I’ve combined teaching, research, and hands-on experience to help others grasp electrical concepts clearly, safely, and practically—whether it’s understanding a circuit or mastering a multimeter.