Are you struggling to get clear, accurate readings from your oscilloscope? Using an oscilloscope probe correctly can make all the difference in your measurements.
Whether you’re a beginner or just want to improve your skills, mastering the right way to use your probe will save you time and frustration. You’ll discover simple steps and expert tips that will help you connect your probe perfectly and read signals like a pro.
Keep reading, and soon you’ll handle your oscilloscope with confidence and precision.
Choosing The Right Probe
Choosing the right oscilloscope probe is important for accurate signal measurement. The probe connects the oscilloscope to the circuit. Picking the correct type helps you see the signal clearly. It also protects your device and the circuit. Understanding the probe types and their uses makes your work easier and more precise.
Types Of Oscilloscope Probes
There are several types of oscilloscope probes. The most common is the passive probe. It is simple and works well for many signals. Active probes have built-in amplifiers. They are useful for weak signals or high frequencies. Differential probes measure the voltage difference between two points. This type is good for circuits without a common ground. Each probe type fits different testing needs.
Selecting Based On Signal Type
Match the probe to your signal type. For low-voltage and simple signals, passive probes are enough. For small or noisy signals, choose active probes. They help reduce noise and improve accuracy. Use differential probes for signals that need isolation. This prevents damage and wrong readings. Knowing your signal type guides the right probe choice.
Considerations For Frequency And Bandwidth
Check the frequency and bandwidth of your signal. The probe must handle the highest frequency you want to measure. Passive probes have limits and lose accuracy at high frequencies. Active probes support higher bandwidths and keep signal quality. Using a probe with insufficient bandwidth distorts the waveform. Always match the probe’s bandwidth to your signal’s frequency.
Credit: www.rohde-schwarz.com
Connecting The Probe Properly
Connecting the oscilloscope probe properly is key to getting accurate signals. A poor connection can cause noise and wrong readings. This section explains how to attach the probe for the best results. Follow these steps to ensure your measurements are clear and reliable.
Attaching The Ground Clip
The ground clip must connect securely to the circuit’s ground point. This creates a reference for the oscilloscope signal. Attach the clip to a stable metal part close to your test point. A loose or distant ground connection causes noise and erratic signals.
Minimizing Ground Loops
Ground loops happen when multiple ground paths form a loop. This loop can pick up interference and distort the signal. Use a single ground clip and avoid connecting to different ground points. Keep the ground wire short to reduce loop area and noise.
Positioning For Stable Contact
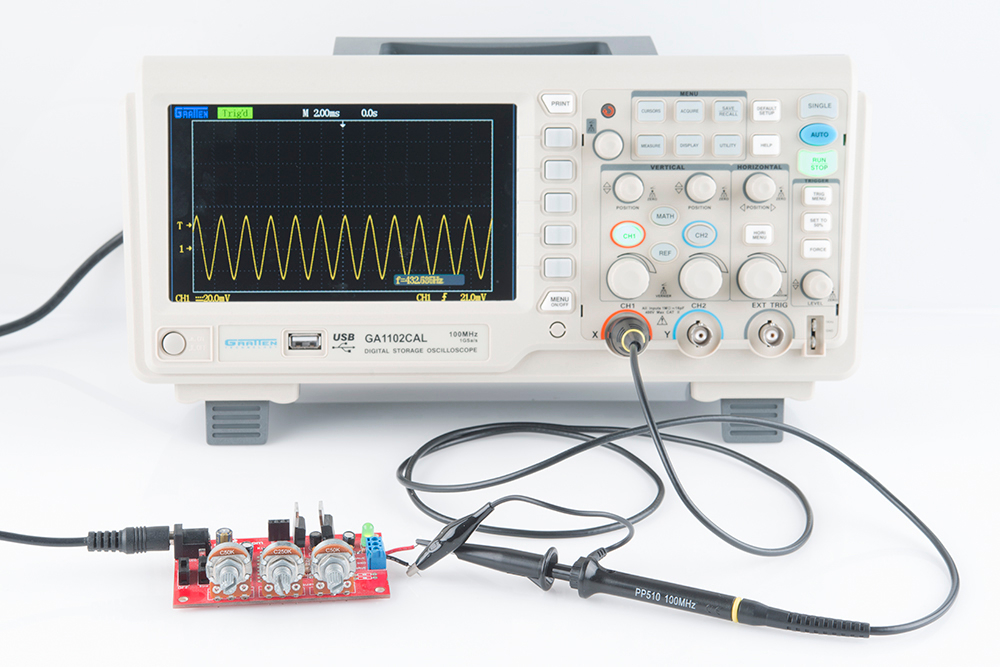
Hold the probe tip steady on the test point. Use a probe holder or a small clip for hands-free work. Make sure the probe tip touches the exact spot you want to measure. Moving the probe can cause unstable readings and signal loss.
Adjusting Probe Compensation
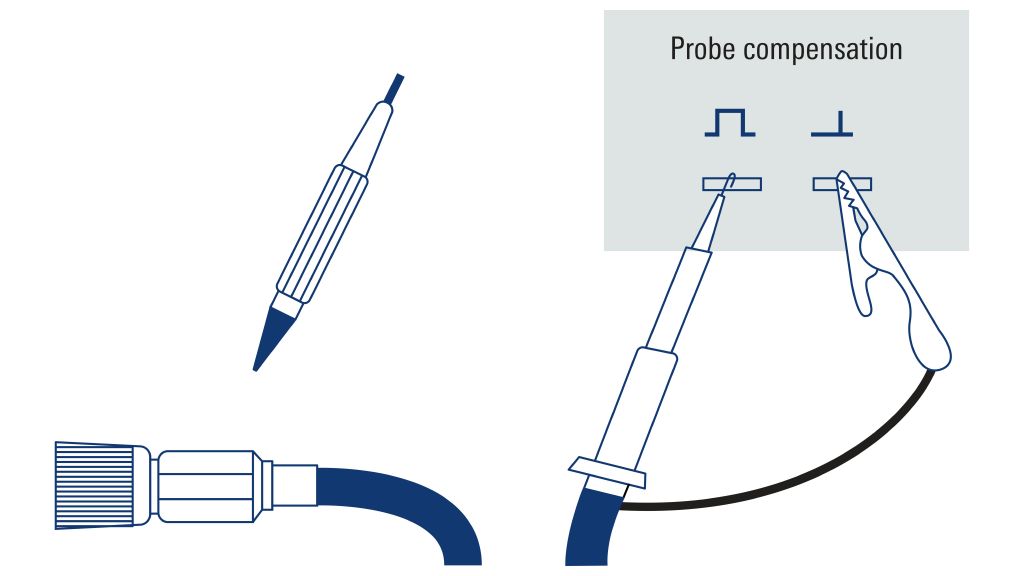
Adjusting probe compensation is a key step for accurate oscilloscope readings. It ensures the probe signal matches the oscilloscope input. Without proper compensation, waveforms may appear distorted or inaccurate. This adjustment is simple but essential for clear measurement results.
Using The Calibration Signal
Most oscilloscopes provide a built-in calibration signal. Connect the probe to this signal to start compensation. The calibration signal is a square wave with a fixed frequency. Display this wave on the oscilloscope screen. Adjust the probe’s compensation capacitor until the waveform looks correct. The square wave edges should be sharp and flat.
Matching Probe To Oscilloscope Input
Probes come with different compensation ranges. Match the probe setting to the oscilloscope input impedance. Usually, set the probe switch to 1x or 10x as needed. Proper matching reduces signal distortion and improves accuracy. Check the oscilloscope manual for input specifications.
Identifying Over Or Under Compensation
Look closely at the square wave shape on the screen. Over-compensation causes the waveform top to be rounded or peaked. Under-compensation makes the waveform edges slope or bow inward. Both distort the true signal shape. Adjust the probe capacitor until the square wave appears balanced and flat.
Credit: learn.sparkfun.com
Reducing Measurement Errors
Reducing measurement errors is essential for accurate oscilloscope readings. Errors can mislead your analysis and cause wrong conclusions. Proper use of the oscilloscope probe helps avoid these errors and improves signal quality. Focus on key factors like signal distortion, probe capacitance, and attenuation. These affect the accuracy of your measurements.
Avoiding Signal Distortion
Signal distortion changes the shape of the waveform. It can hide important details in your signal. Use a probe with low loading effect to reduce distortion. Keep probe leads short to lower interference. Connect the ground clip as close to the test point as possible. This reduces noise and preserves the true signal shape.
Managing Probe Capacitance
Probe capacitance can slow down fast signals. It adds extra load to the circuit under test. Use probes with low input capacitance to reduce this effect. Check the probe’s specifications before use. High capacitance probes can cause inaccurate timing and amplitude errors. Adjust the probe compensation to match the oscilloscope input.
Using Proper Probe Attenuation
Probe attenuation scales the signal before it reaches the oscilloscope. Using the correct attenuation prevents signal clipping and overload. Match the probe attenuation setting with the oscilloscope input. Common settings are 1x, 10x, and 100x. A 10x probe reduces loading and extends the bandwidth. Always verify the oscilloscope’s channel setting matches the probe attenuation.
Handling High-frequency Signals
Handling high-frequency signals with an oscilloscope probe needs care and precision. High frequencies can cause signal loss or noise. This affects the accuracy of your measurements. Using the right techniques helps keep the signals clean and clear. It also protects your equipment from damage. Here are some important tips to manage high-frequency signals effectively.
Shortening Ground Leads
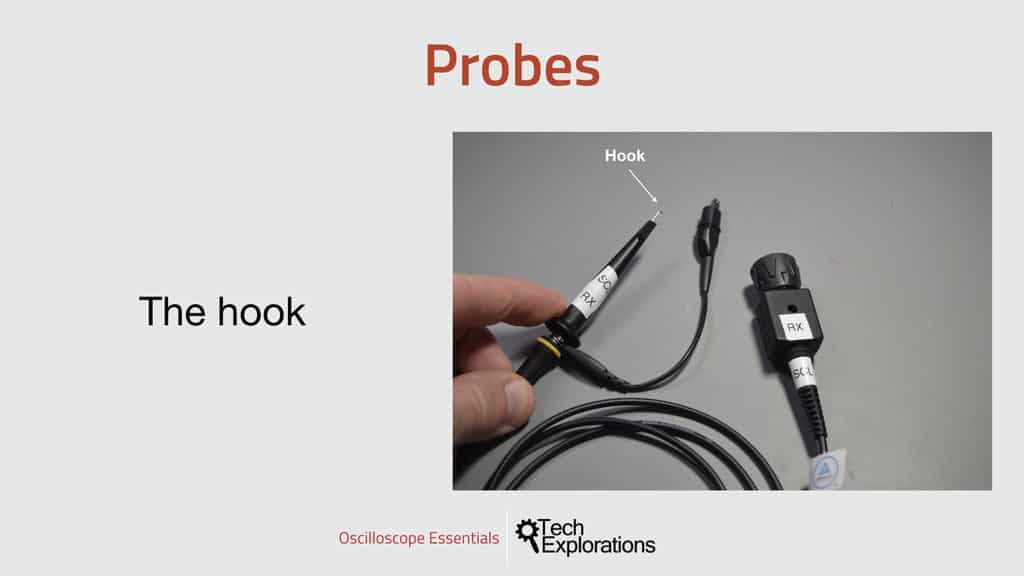
Long ground leads add extra inductance. This can distort high-frequency signals. Keep the ground lead as short as possible. Use a ground spring or a small clip near the probe tip. This reduces noise and improves signal quality. Short ground leads help the oscilloscope capture signals more accurately.
Using Active Probes
Active probes have built-in amplifiers. They reduce the load on the circuit. This is important for high-frequency signals. Active probes offer better bandwidth and less signal distortion. They also have higher input impedance. Using active probes keeps the signals strong and clean for better readings.
Shielding And Cable Management
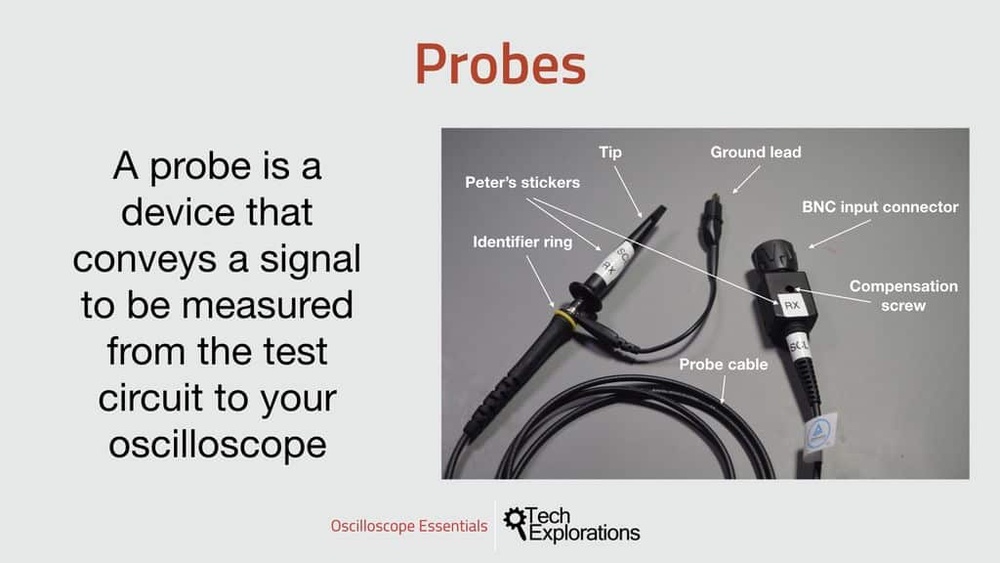
Shielding prevents external noise from affecting the signal. Use coaxial cables with proper shielding for the probe. Keep cables away from power lines and other noise sources. Arrange cables neatly to avoid loops and tangles. Good cable management reduces interference and ensures stable measurements.
Credit: techexplorations.com
Maintaining Probe Integrity
Maintaining the integrity of your oscilloscope probe is key for accurate measurements. A well-kept probe lasts longer and delivers precise signals. Regular care prevents damage and reduces errors during testing. Here are some simple steps to keep your probe in top shape.
Regular Inspection And Cleaning
Check the probe regularly for dirt, dust, and damage. Clean the tip gently with a soft cloth or alcohol wipe. Avoid harsh chemicals that can harm the probe surface. Inspect the cable for cracks or bends that can affect performance. A clean probe ensures clear signal transmission.
Safe Storage Practices
Store your probe in a dry, dust-free place. Use a protective case or cover to avoid physical damage. Keep cables coiled loosely to prevent stress and breaks. Avoid placing heavy objects on the probe or cable. Proper storage protects the probe from wear and tear.
Replacing Worn Components
Replace worn or damaged parts immediately. Probe tips, connectors, and cables can wear out over time. Using damaged parts leads to poor signal quality and inaccurate results. Keep spare parts handy for quick replacement. Regular updates help maintain probe accuracy and reliability.
Frequently Asked Questions
What Is The Purpose Of An Oscilloscope Probe?
An oscilloscope probe connects the test circuit to the oscilloscope. It accurately transfers the electrical signal for precise measurement and analysis. Probes help maintain signal integrity and reduce noise, ensuring clear waveform display on the oscilloscope screen.
How Do I Properly Connect An Oscilloscope Probe?
Connect the probe tip to the signal point and the ground clip to a circuit ground. Ensure a secure connection to avoid noise and signal distortion. Proper connection helps capture accurate waveforms for analysis.
How To Calibrate An Oscilloscope Probe?
Use the oscilloscope’s built-in calibration signal output. Connect the probe to this point and adjust the probe compensation trimmer until the displayed waveform is flat and square. Proper calibration ensures accurate signal measurements.
What Types Of Oscilloscope Probes Are Available?
Common types include passive, active, differential, and current probes. Passive probes suit general use, while active probes are for high-frequency signals. Differential probes measure voltage differences, and current probes measure current without breaking the circuit.
Conclusion
Using an oscilloscope probe correctly helps you see electronic signals clearly. Connect the probe carefully to avoid errors or damage. Adjust the settings to match your test needs. Check the ground clip for a stable reference point. Practice often to gain confidence and skill.
This simple tool makes troubleshooting easier and faster. Remember, safety and accuracy come first in every step. Keep learning, and your work will improve over time.

I’m Asif Ur Rahman Adib, an Electrical Engineer and lecturer. My journey began in the lab, watching students struggle with instruments they used every day without fully understanding them. Over time, I’ve combined teaching, research, and hands-on experience to help others grasp electrical concepts clearly, safely, and practically—whether it’s understanding a circuit or mastering a multimeter.