Have you ever wondered if your circuit breaker is working properly but didn’t know how to check it safely? Knowing how to test a circuit breaker with a multimeter can save you time, money, and frustration.
You don’t need to be an expert or call a professional right away. With just a few simple steps, you can quickly find out if your breaker is the problem or if something else is causing the issue. Keep reading, and you’ll learn exactly how to do it yourself, step by step.
Your home’s electrical safety depends on it!
Tools Needed
Checking a circuit breaker with a multimeter needs the right tools. These tools ensure you work safely and get accurate results. Preparing all tools before starting saves time and avoids mistakes.
Multimeter
A multimeter is the main tool for this task. It measures voltage, current, and resistance. Choose a digital multimeter for clear and easy-to-read results.
Insulated Gloves
Insulated gloves protect your hands from electric shocks. They are essential when working with electrical panels. Safety first, always.
Screwdriver
A screwdriver helps open the circuit breaker panel. Use one that fits the screws well. This prevents damage to the panel or screws.
Flashlight
A flashlight is useful for better visibility inside the panel. Electrical panels are often in dark places. Good lighting helps you see connections clearly.
Safety Glasses
Safety glasses protect your eyes from sparks or debris. Always wear them to avoid injuries during testing. Safety gear matters.
Credit: www.youtube.com
Safety Precautions
Safety is the top priority when checking a circuit breaker with a multimeter. Electricity can cause serious injuries or damage if handled carelessly. Taking the right precautions protects you and your home.
Always prepare before testing. Use the correct tools and follow safety rules. This ensures a smooth and safe process.
Turn Off The Main Power
Switch off the main power before opening the breaker panel. This stops electricity flow and lowers the risk of shock. Use a flashlight if the area is dark.
Wear Protective Gear
Wear insulated gloves and safety glasses. These protect your hands and eyes from sparks or accidental shocks. Avoid wearing metal rings or watches.
Use A Reliable Multimeter
Choose a multimeter in good condition. Test it on a known live source before use. A faulty meter can give wrong readings or cause harm.
Check For Voltage Before Touching
Always test the breaker terminals for voltage first. This confirms the power is off. Never touch wires or parts without checking.
Work In A Dry Area
Ensure the workspace is dry and free of water. Water conducts electricity and raises the shock risk. Avoid standing on wet floors.
Preparing The Multimeter
Preparing the multimeter is the first step to check a circuit breaker safely. It ensures accurate readings and protects you from electric shock. Understanding how to set up your multimeter saves time and prevents mistakes.
Selecting The Right Setting
Turn the dial on the multimeter to the correct measurement type. For circuit breakers, use the AC voltage setting. This setting usually has a “V” with a wavy line (~) above it. Choose a voltage range higher than your circuit’s voltage. This avoids damaging the multimeter or getting false readings.
Testing The Multimeter Functionality
Check if the multimeter works before testing the circuit breaker. Turn it on and look at the screen. The display should show a number or zero. Use the multimeter leads by touching them together. The reading should be close to zero, showing continuity. If the screen shows an error, replace the batteries or the multimeter may be faulty.
Credit: mrelectric.com
Locating The Circuit Breaker
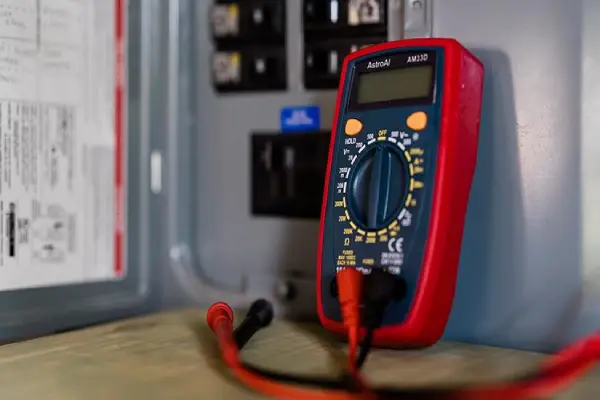
Finding the circuit breaker is the first step in checking it with a multimeter. The circuit breaker controls electricity flow in your home. It helps protect your wiring from damage. Knowing its location makes testing easier and safer.
Most homes have a circuit breaker panel. This panel is usually near the main electrical entry point. Common places include basements, garages, or utility rooms. The panel door often has a label or sticker showing “Circuit Breaker” or “Electrical Panel.”
Check Common Areas For The Panel
Look in places where utility equipment is stored. Basements often house the main electrical panel. Garages are another frequent spot. Some panels are outside, mounted on the side of the house. This depends on your home’s design and local codes.
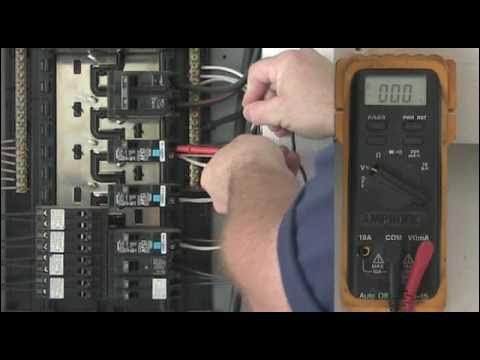
Identify The Main Breaker And Individual Switches
Inside the panel, find a large switch at the top or bottom. This is the main breaker, controlling all power. Below it, smaller switches control individual circuits. Each switch should have a label indicating the area it serves.
Ensure Safety Before Opening The Panel
Turn off all appliances before opening the panel. Stand on dry ground and use insulated gloves if possible. Avoid touching metal parts inside the panel. Safety first to prevent electric shocks or injury.
Testing For Voltage
Testing for voltage is a key step to check if a circuit breaker works properly. It shows if electricity flows through the wires. A multimeter helps measure voltage safely and accurately. This test tells if the breaker is live or switched off.
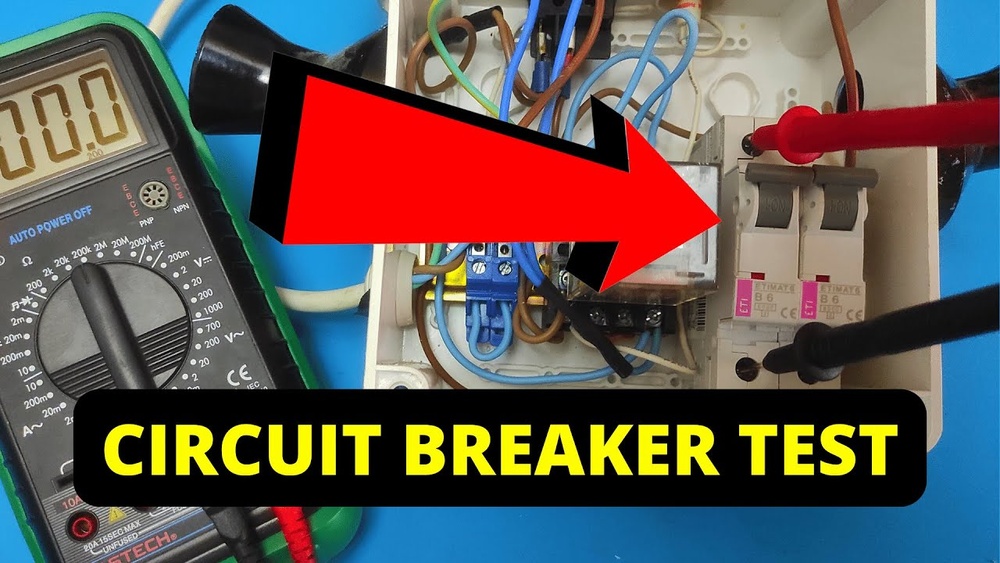
Testing Live Wires
Turn off the main power before starting. Set your multimeter to measure AC voltage. Carefully touch one probe to the breaker terminal. Touch the other probe to a ground or neutral point. Hold the probes steadily. A voltage reading means the wire is live. No reading means no power at the breaker.
Interpreting Voltage Readings
Check the multimeter display. Typical home voltage is about 120 volts in the US. A reading near this means the breaker is working. A reading of zero or very low voltage means the breaker may be faulty. Sudden voltage drops or unstable readings also indicate issues. Always compare readings with your local voltage standards.

Credit: www.wikihow.com
Testing For Continuity
Testing for continuity is a simple way to check if a circuit breaker works properly. It tells you if the electrical path is complete. This test helps find broken or faulty breakers. A multimeter makes this test easy and quick.
Setting Up Continuity Mode
First, turn off power to the breaker panel. Safety is important. Then, set your multimeter to continuity mode. This mode usually has a symbol like a sound wave or a diode. Touch the two probes together to check if the meter beeps or shows zero. This means the meter is ready.
Checking Breaker Contacts
Remove the breaker from the panel carefully. Place one probe on the breaker’s input terminal. Put the other probe on the output terminal. If the multimeter beeps or shows a low number, the breaker has continuity. No beep or a high number means the breaker is faulty. This test helps decide if you must replace the breaker.
Identifying A Faulty Breaker
Identifying a faulty breaker is key to fixing electrical problems safely. A breaker that does not work correctly can cause power loss or even dangerous situations. Checking it carefully helps keep your home safe and your electricity running well.
Using a multimeter is a simple way to test the breaker’s condition. Before testing, knowing the signs of a bad breaker can save time and effort. Not all breakers need replacement, so it is important to know when to replace one.
Signs Of A Bad Breaker
Frequent tripping is a common sign of a bad breaker. If the breaker trips with no clear reason, it may be faulty. Another sign is a breaker that feels hot or smells burnt. Flickering lights or power loss in certain areas can also mean a breaker is failing. Sometimes, a breaker will not reset after tripping, showing it might be broken.
When To Replace
Replace a breaker if it trips often without cause. Also, change it if the multimeter shows no voltage or irregular readings. A breaker that is hot to touch or has visible damage needs replacing. Never ignore a breaker that fails to reset. These signs point to a breaker that cannot protect your electrical system anymore.
Additional Tips
Checking a circuit breaker with a multimeter requires care and attention. Follow these additional tips to make the process safer and easier. These tips help you get accurate readings and avoid common mistakes.
Use The Right Multimeter Setting
Select the correct mode on your multimeter. Choose the voltage or continuity setting based on the test you perform. Using the wrong setting can give false results or damage the meter.
Wear Safety Gear
Always wear insulated gloves and safety glasses. Protect yourself from electric shocks and sparks. Safety gear reduces the risk of injury during testing.
Test The Multimeter First
Check your multimeter on a known working circuit. This confirms the meter works properly. Avoid wasting time on faulty equipment.
Turn Off Power When Possible
Switch off the main power before testing the breaker. This lowers the risk of shocks. Only test live circuits if necessary and use extra caution.
Keep Hands Dry
Make sure your hands are dry. Moisture can cause electric shocks. Dry hands improve grip on the multimeter probes.
Note The Breaker Position
Record the breaker’s ON or OFF status before testing. This helps you understand the results better. It also makes resetting easier after the test.
Frequently Asked Questions
How Do I Test A Circuit Breaker With A Multimeter?
Set your multimeter to AC voltage. Turn off the breaker, remove the panel cover, and test voltage at breaker terminals. A reading near zero volts means the breaker is off; a normal voltage reading indicates it’s on and functioning.
Can A Multimeter Detect A Faulty Circuit Breaker?
Yes, a multimeter can identify a faulty breaker. Check for voltage at the breaker output; no voltage suggests a problem. Also, test continuity with the breaker off to ensure the internal switch operates correctly.
What Multimeter Setting Is Best For Breaker Testing?
Use the AC voltage setting to check breaker output voltage. For continuity or resistance testing, switch to the ohms setting. Always ensure the multimeter is properly calibrated before testing.
Is It Safe To Test Circuit Breakers With A Multimeter?
Testing is safe if you follow precautions. Turn off the main power before opening the panel. Use insulated tools and avoid touching live wires. If unsure, consult a professional electrician.
Conclusion
Checking a circuit breaker with a multimeter is simple and safe. Always turn off the power before you start. Use the multimeter to test for voltage or continuity. This helps find problems quickly. Regular checks keep your electrical system working well.
Stay careful and take your time. Now, you can test breakers with confidence and ease.

I’m Asif Ur Rahman Adib, an Electrical Engineer and lecturer. My journey began in the lab, watching students struggle with instruments they used every day without fully understanding them. Over time, I’ve combined teaching, research, and hands-on experience to help others grasp electrical concepts clearly, safely, and practically—whether it’s understanding a circuit or mastering a multimeter.