Are you about to work with electrical wiring but unsure if the wire is live? Testing a wire before touching it is crucial for your safety.
Using a multimeter to check if a wire is live is a simple skill you can learn quickly. Imagine avoiding shocks, accidents, or costly mistakes just by knowing how to test your wires correctly. You’ll discover easy, step-by-step instructions to confidently test wires with a multimeter—no confusing jargon, just clear, practical advice you can trust.
Keep reading, and make your next electrical task safer and smarter.
Safety Precautions
Testing if a wire is live with a multimeter can be risky without safety steps. Follow these precautions to protect yourself from electrical shocks and injuries. Safety must be your top priority before handling any wires or electrical devices.
Wear Protective Gear
Always wear rubber gloves and safety goggles. Gloves stop electric shocks from reaching your skin. Goggles protect your eyes from sparks or debris. Use clothes that cover your arms and legs fully.
Turn Off Power Source
Switch off the main power before testing wires. This lowers the chance of electric shock. Use a circuit breaker or fuse box to cut the power. Confirm power is off by testing with your multimeter first.
Use Insulated Tools
Choose tools with insulated handles only. Insulated tools prevent electricity from flowing through them. This reduces the risk of shock. Do not use metal tools without insulation when testing live wires.
Credit: www.youtube.com
Choosing The Right Multimeter
Choosing the right multimeter is key to testing if a wire is live safely and accurately. Not all multimeters work the same. Some are better for beginners, while others suit experts. Picking the right one helps avoid mistakes and saves time. This guide breaks down types, features, and setup tips to help you select the best tool.
Types Of Multimeters
Multimeters come in two main types: analog and digital. Analog multimeters have a needle that moves on a scale. They are less common today. Digital multimeters show readings on a screen. They are easier to read and more accurate. For most users, a digital multimeter is the best choice.
Features To Look For
Look for a multimeter with a clear display. A backlit screen helps in low light. Choose one with a continuity test function. This feature lets you check if a wire is connected. Safety ratings are important too. A multimeter with CAT III or CAT IV rating is safer for home wiring. Auto-ranging models adjust to the right setting automatically. This makes testing simpler and faster.
Setting Up The Multimeter
Before testing, set the multimeter correctly. Turn the dial to the voltage (V) setting. Choose AC voltage (often marked as V~) for household wires. Insert the black probe into the common (COM) port. Put the red probe into the voltage (V) port. Check the battery and replace it if needed. Test the multimeter on a known live source to be sure it works.
Preparing For The Test
Before testing if a wire is live with a multimeter, proper preparation is key. It keeps you safe and ensures accurate readings. This step-by-step guide covers how to prepare effectively for the test.
Inspecting The Wire
Check the wire carefully for any damage. Look for cuts, frayed ends, or exposed metal. Avoid testing damaged wires as they can cause shocks. Make sure the wire is connected properly to the circuit.
Ensuring Dry Conditions
Keep the wire and your hands dry. Water can cause false readings or electrical shocks. Work in a dry area with no moisture around. Dry conditions make your test safer and more reliable.
Positioning The Probes
Hold the multimeter probes firmly. Place one probe on the wire’s metal conductor. Touch the other probe to a ground or neutral point. Steady contact helps get clear and stable readings from the multimeter.
Testing Wire For Voltage
Testing wire for voltage is a key step to check if the wire is live or not. A multimeter helps measure the electrical voltage safely. It shows if electricity flows through the wire. This step prevents accidents and equipment damage.
Before starting, ensure the multimeter is in good condition. Use the right settings for accurate results. Safety comes first. Wear gloves and keep your hands dry.
Selecting Voltage Mode
Turn on the multimeter. Look for the voltage setting symbol, often marked as V. Choose AC voltage mode for household wires. Use DC voltage mode for batteries or electronics. Selecting the right mode is crucial for correct readings.
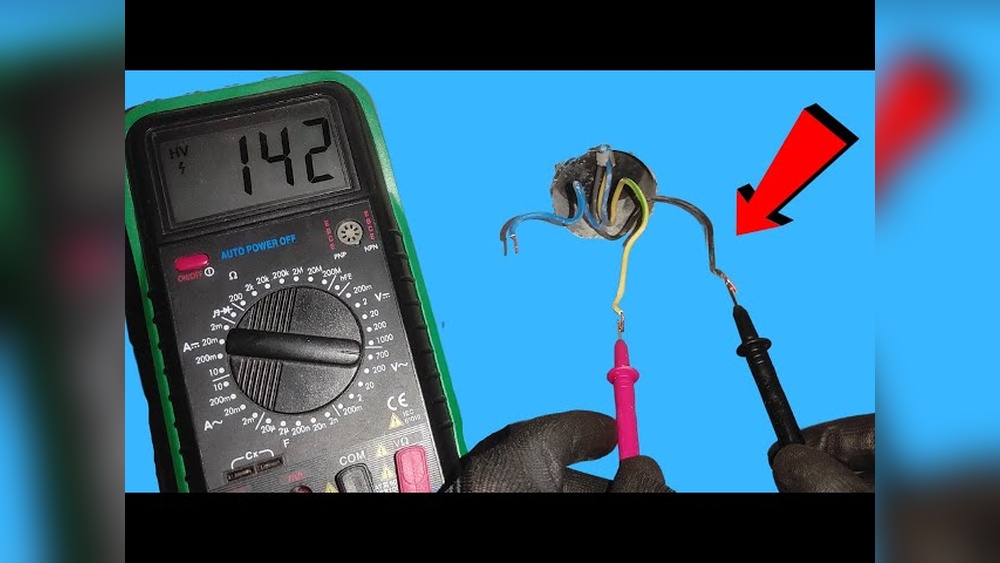
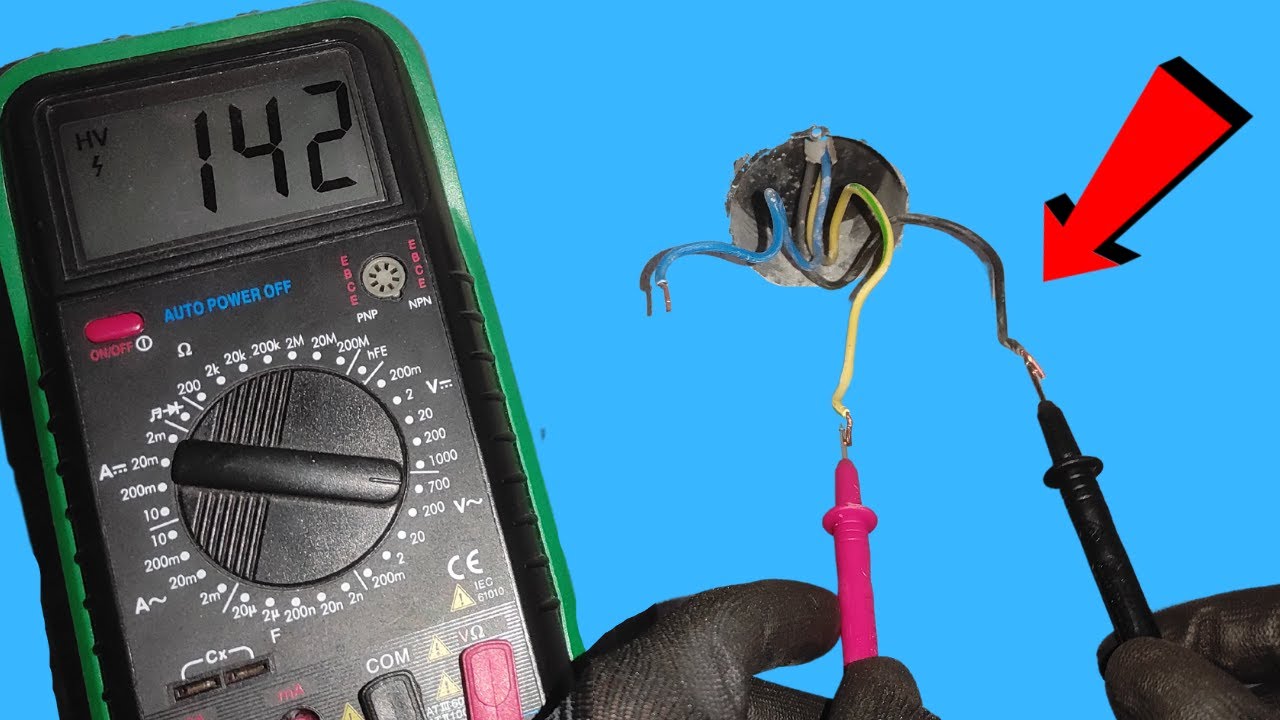
Measuring Ac Voltage
Touch the black probe to the ground or neutral wire. Place the red probe on the wire to test. Read the voltage value on the screen. A live wire shows a voltage usually between 110V to 240V. No reading means no voltage or a broken circuit.
Measuring Dc Voltage
Set the multimeter to DC voltage mode. Connect the black probe to the negative terminal. Place the red probe on the positive terminal of the wire. The screen shows the voltage level. This test is common for batteries and power adapters.
Interpreting Multimeter Readings
Understanding multimeter readings is key to testing if a wire is live. The multimeter shows voltage levels that tell if electricity flows through the wire. Clear reading interpretation helps avoid mistakes and ensures safety. Below are signs to watch for when checking wires.
Live Wire Indications
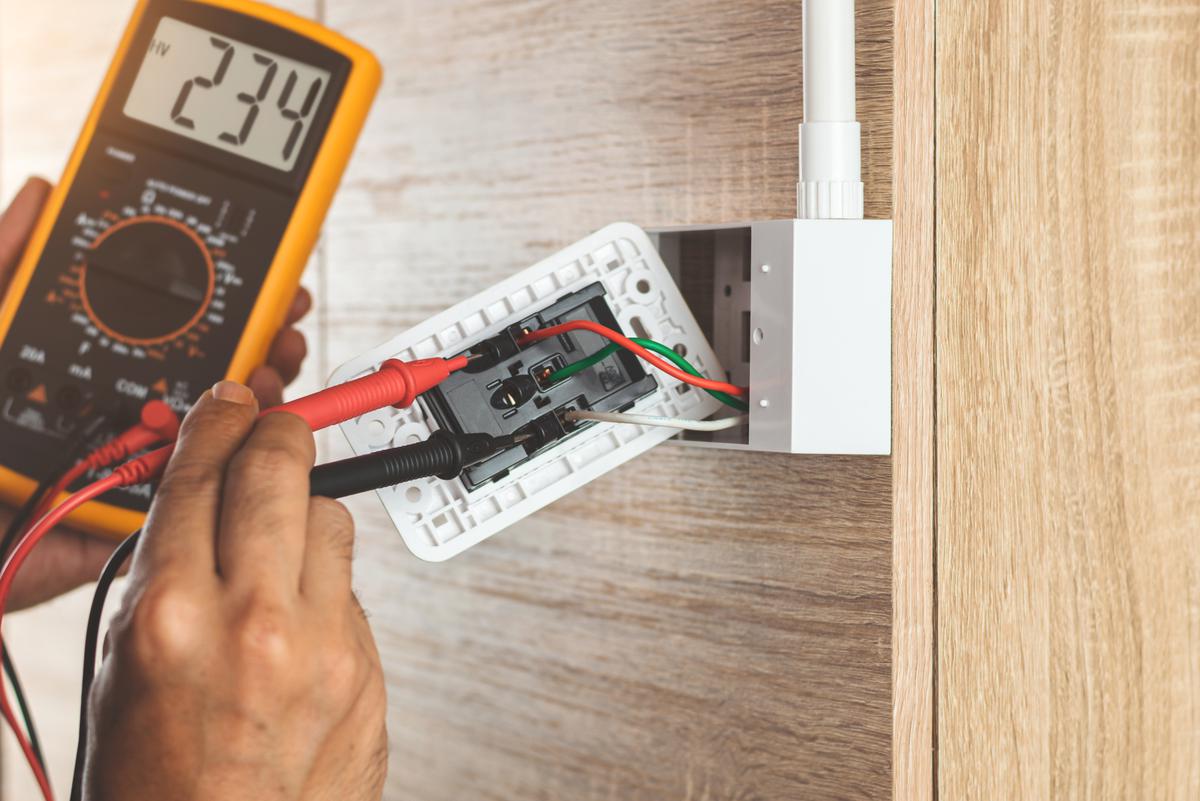
A live wire shows voltage on the multimeter screen. For home wiring, expect around 110 to 240 volts. The exact number depends on your country’s electrical system. A steady number means the wire carries current. The multimeter needle or digital display will not flicker or drop to zero.
Check both the voltage and the type (AC or DC) on your meter. Live wires usually show AC voltage in homes. A reading above zero but below the expected voltage can mean a weak or partial connection.
No Voltage Signs
No voltage means the wire is not live. The multimeter will show zero or a very low number close to zero. This reading means no current flows through the wire. It could be switched off or disconnected.
Make sure the multimeter probes touch the correct wire parts. Loose contact can cause zero readings even if the wire is live. Always test a known live wire first to confirm your multimeter works.
Handling Inconsistent Results
Inconsistent readings can confuse. The voltage might jump or flicker on the display. This can happen because of loose connections or interference. Check probe contact and try again.
Sometimes the wire is damaged or the circuit partially live. Test other wires or points in the circuit to compare readings. If unsure, consult a professional electrician to avoid risk.
Credit: www.contractors.com
Common Mistakes To Avoid
Testing if a wire is live with a multimeter is simple but requires care. Many beginners make mistakes that can cause wrong readings or danger. Avoiding common errors helps get accurate results and keeps you safe.
Incorrect Multimeter Settings
Set your multimeter to the right mode before testing. Use the AC voltage setting for house wiring. Selecting the wrong setting can damage the multimeter or give false readings. Double-check the dial and range for the wire you test.
Improper Probe Contact
Make sure the probes touch the wire firmly. Loose contact leads to unstable or no readings. Hold the probes steady on the metal parts, not on insulation. Clean probe tips improve connection and accuracy.
Ignoring Safety Measures
Always wear insulated gloves and eye protection. Do not test wires in wet conditions. Turn off power if unsure, then test again. Keep hands dry and away from metal surfaces. Safety prevents shocks and serious injuries.
Additional Testing Tips
Testing if a wire is live requires care and accuracy. Using a multimeter is common, but some extra tips help improve safety and results. These tips make testing easier and more reliable.
Using Non-contact Voltage Testers
Non-contact voltage testers detect electricity without touching wires. They show if a wire has voltage by lighting up or buzzing. Use them before a multimeter test to avoid shocks. These testers work well for quick checks and tight spaces. Always check the tester’s battery before use.
Testing Multiple Wires
Testing more than one wire means checking each wire separately. Use the multimeter on each wire’s metal end carefully. Keep hands steady and avoid touching metal parts. Label wires after testing to remember which are live. Double-check any wire that looks suspicious.
Regular Multimeter Maintenance
Keep your multimeter in good shape for accurate readings. Clean the probes after each use to remove dirt. Store the device in a dry place to prevent damage. Change the batteries often to keep the display bright. Check the multimeter’s settings before every test.
:strip_icc()/voltage-detector-hot-cable-77726753-1946242d423c41a6802cc874eb7c8c89.jpg)
Credit: www.bhg.com
Frequently Asked Questions
How Do I Safely Test If A Wire Is Live?
Turn off the power before connecting the multimeter. Set the multimeter to AC voltage. Touch the probes to the wire terminals. A voltage reading means the wire is live. Always follow safety precautions to avoid electric shock.
What Multimeter Setting Detects Live Wires?
Use the AC voltage setting on your multimeter to detect live wires. This setting measures the voltage flowing through the wire. Ensure the multimeter range is appropriate for your electrical system. This helps confirm if the wire carries current.
Can A Multimeter Detect Live Wires Without Contact?
No, a standard multimeter requires contact with the wire to test voltage. For non-contact detection, use a non-contact voltage tester. Multimeters need probe contact to measure electrical voltage accurately and safely.
Why Is Testing Wires Important Before Electrical Work?
Testing wires ensures they are not live, preventing electric shock. It confirms power is off before starting repairs or installations. This step increases safety and avoids damage to electrical components or injury.
Conclusion
Testing if a wire is live with a multimeter is simple and safe. Always double-check your tools before starting. Touch the probes carefully to the wire ends. Watch the multimeter display for voltage readings. A live wire shows voltage; no reading means no power.
This quick test helps avoid accidents and electrical shocks. Practice often to get comfortable with the steps. Stay alert and never rush the process. Safety first, always. Now, you can check wires confidently and protect yourself.

I’m Asif Ur Rahman Adib, an Electrical Engineer and lecturer. My journey began in the lab, watching students struggle with instruments they used every day without fully understanding them. Over time, I’ve combined teaching, research, and hands-on experience to help others grasp electrical concepts clearly, safely, and practically—whether it’s understanding a circuit or mastering a multimeter.