If your engine is acting up or your car feels less powerful, the knock sensor might be the culprit. Testing this small but important part can save you from costly repairs down the road.
You don’t need to be a mechanic or own expensive tools—you just need a multimeter and a little guidance. You’ll learn exactly how to test a knock sensor quickly and accurately. By the end, you’ll know if your sensor is working properly or if it’s time for a replacement.
Keep reading to take control of your car’s health and avoid unexpected breakdowns.
Tools Needed
Testing a knock sensor requires the right tools. These tools help you check the sensor’s condition accurately. You do not need many items, but choosing the correct ones is important. This section explains what tools you need to test a knock sensor with a multimeter.
Choosing The Right Multimeter
Select a multimeter that can measure resistance and voltage. Digital multimeters are easier to read and more accurate. Check if the multimeter has a low ohm range for resistance testing. Choose a model with clear display and simple controls. A reliable multimeter improves your testing experience and results.
Additional Equipment
Besides the multimeter, you need some extra tools. Use insulated probes for safe and precise contact with sensor terminals. A repair manual or wiring diagram helps identify sensor wires. Gloves protect your hands from dirt and heat. Keep a flashlight handy to see clearly in dark engine areas.
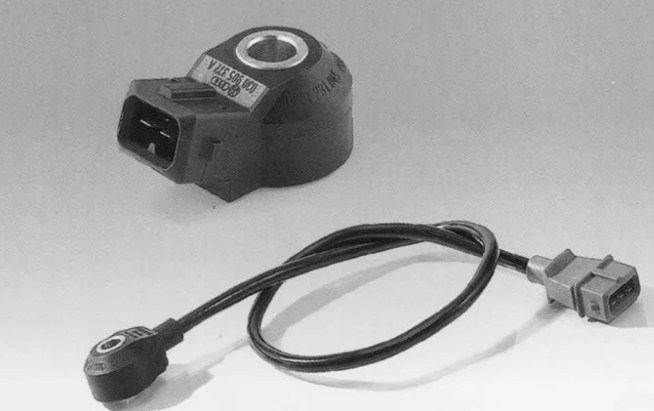
Locate The Knock Sensor
Locating the knock sensor is the first step in testing it with a multimeter. The knock sensor detects engine knocking or pinging. Finding it can be tricky because its position varies by car make and model. Knowing its common locations helps you find it faster. Always handle parts carefully to avoid damage.
Typical Sensor Locations
The knock sensor is usually on the engine block, cylinder head, or intake manifold. Most often, it is near the engine’s lower side. Some cars have it on the side of the engine, close to the exhaust manifold. Check around these areas carefully. Look for a small, round sensor with a wire connector attached.
Safety Precautions
Turn off the engine before searching for the sensor. Let the engine cool down to avoid burns. Wear gloves to protect your hands from hot or sharp parts. Disconnect the car battery to prevent electrical shocks. Work in a well-lit area to see clearly. Keep tools organized to avoid accidents.
Prepare The Vehicle
Preparing your vehicle is the first step to test a knock sensor safely. It helps avoid accidents and damage. Follow these steps carefully before using a multimeter.
Turn Off The Engine
Make sure the engine is completely off. Do not test the knock sensor while the engine runs. This prevents electric shocks and moving parts injuries.
Disconnect The Battery
Next, disconnect the vehicle’s battery. Remove the negative terminal first for safety. This stops power flow to the sensor and wiring. It keeps you safe from electric hazards during testing.

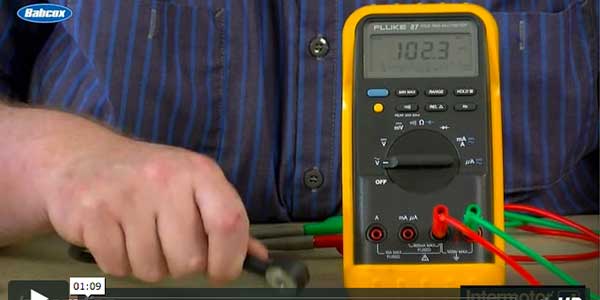
Credit: www.youtube.com
Set Up The Multimeter
Setting up your multimeter correctly is the first step to testing a knock sensor accurately. A properly set multimeter gives you clear, reliable readings. This setup ensures you measure the sensor’s resistance or voltage without errors. Follow these simple steps to prepare your device for the test.
Select The Correct Mode
Turn on your multimeter and look for the mode dial. Choose the resistance mode, often marked as “Ω” or “ohms.” This mode measures the sensor’s resistance. For voltage testing, switch to the DC voltage mode, marked as “V” with a straight line. Picking the right mode is vital to get accurate results and avoid damaging the multimeter.
Calibrate The Device
Calibration ensures your multimeter shows correct values. Touch the two test leads together and check the display. It should read zero or very close to it. If not, use the calibration dial or button to adjust. Proper calibration removes errors caused by lead resistance. Always recalibrate before starting new tests for best accuracy.
Measure Sensor Resistance
Testing a knock sensor involves measuring its resistance with a multimeter. Connect the meter leads to the sensor terminals and check the reading. A proper resistance value shows the sensor is working correctly.
Connect Multimeter Probes
Start by setting your multimeter to the ohms (Ω) setting. This measures resistance. Take the two probes of the multimeter. Touch one probe to each terminal of the knock sensor. Make sure the probes touch the metal parts firmly. Avoid letting the probes touch each other. This ensures an accurate reading.
Read The Resistance Value
Look at the multimeter screen for the resistance value. A healthy knock sensor usually shows a specific range, often between 500 and 1000 ohms. Check your vehicle’s manual for the exact range. If the reading is too high or too low, the sensor might be faulty. A reading of zero or infinite means a broken sensor or bad connection.
Test Sensor Voltage
Testing the sensor voltage is a key step in checking your knock sensor’s health. The knock sensor sends voltage signals to the engine control unit. These signals help the engine adjust timing for smooth running. Using a multimeter, you can measure this voltage and see if the sensor works properly.
It is important to restore power to the system before testing. This ensures accurate voltage readings and proper sensor function.
Reconnect Battery
After setting up your multimeter, reconnect the car battery. This powers the knock sensor and the vehicle’s electronics. Make sure the battery terminals are tight and clean. Loose or corroded connections can cause false readings. Once the battery is connected, let the vehicle sit for a few minutes. This allows the sensor and engine control unit to start communicating.
Monitor Voltage Output
Set your multimeter to measure voltage on the correct scale. Connect the multimeter probes to the sensor’s signal wire and ground. Watch the voltage reading on the multimeter display. The voltage should change as you gently tap near the sensor. This simulates engine knocking. A steady or zero voltage means the sensor may be faulty. Note the voltage range and stability during your test. This data helps diagnose sensor issues effectively.
Interpret Test Results
After testing the knock sensor with a multimeter, the next step is to interpret the results. This step helps you understand if the sensor works properly or needs replacement. Knowing how to read the numbers and signals can save time and money on car repairs.
Normal Resistance Range
The knock sensor usually has a specific resistance range. This range varies by car model but often falls between 500 and 1000 ohms. If your multimeter shows a value within this range, the sensor likely works well. A reading too high or too low signals a faulty sensor. A very high resistance or infinite reading means the sensor may be broken. A very low reading close to zero suggests a short circuit inside the sensor.
Voltage Fluctuation Indicators
Another way to check the knock sensor is by measuring voltage changes. While the engine runs, the sensor sends voltage signals when it detects engine knock. Use the multimeter set to measure AC voltage. Watch for small voltage spikes when the engine runs under load or acceleration. No voltage changes or constant zero readings indicate the sensor is not working. Irregular or unstable voltage signals also point to sensor problems.
Credit: www.tomorrowstechnician.com
Troubleshooting Tips
Troubleshooting a knock sensor with a multimeter can be tricky. Small mistakes can cause wrong readings. Knowing what to check helps save time and effort. Here are key tips to guide you during testing.
Common Sensor Issues
Knock sensors often fail due to heat damage. Constant engine heat can break the sensor’s internal parts. Wiring problems also cause sensor errors. Look for broken wires or loose connections. Dirt and oil buildup can block sensor signals. Clean the sensor carefully before testing. A faulty sensor may cause engine knocking or poor fuel economy. Check for these signs to spot sensor issues early.
When To Replace The Sensor
Replace the knock sensor if it shows no electrical response. A multimeter reading outside the normal range means failure. Persistent engine knock despite repairs points to a bad sensor. Cracks or visible damage on the sensor body mean replacement is needed. Always use a sensor made for your vehicle model. Installing the right part avoids future problems and keeps your engine safe.
Credit: www.nevsemi.com
Frequently Asked Questions
How Do I Test A Knock Sensor With A Multimeter?
To test a knock sensor, set your multimeter to ohms. Disconnect the sensor and measure its resistance. The typical range is 500-620 ohms. If the reading is outside this range, the sensor may be faulty and require replacement.
What Resistance Should A Knock Sensor Show?
A properly functioning knock sensor usually shows resistance between 500 and 620 ohms. If your multimeter reading is significantly higher or lower, it indicates a potential sensor issue that could affect engine performance.
Can I Test A Knock Sensor Without Removing It?
It’s best to disconnect the knock sensor before testing. Testing while connected can give inaccurate readings due to other circuit components interfering with the measurement.
What Causes A Knock Sensor To Fail?
Knock sensors can fail due to heat damage, corrosion, or wiring issues. Regular inspection and testing can help identify problems early and maintain engine efficiency.
Conclusion
Testing a knock sensor with a multimeter helps find engine problems early. The process is simple and saves time and money. Always handle the sensor and tools carefully for safety. Regular checks keep your engine running smoothly and avoid big repairs.
Practice these steps to feel more confident in car maintenance. Small efforts now prevent bigger issues later. Stay patient and follow each step clearly. You can keep your vehicle healthy with basic skills like this.

I’m Asif Ur Rahman Adib, an Electrical Engineer and lecturer. My journey began in the lab, watching students struggle with instruments they used every day without fully understanding them. Over time, I’ve combined teaching, research, and hands-on experience to help others grasp electrical concepts clearly, safely, and practically—whether it’s understanding a circuit or mastering a multimeter.